
With my love of the homemade home I thought today I would share one of Kirstie Allsopps tutorials from Kirstie’s Homemade Home http://www.channel4.com/

You will need
wire frame rings
pvc backing material
fabric (velvet,
double sided sticky tape
braiding
Step One: Stick The Fabric To The Backing Material
Choose your fabric depending on what sort of light you want your finished lamp to give off. Material with red and yellow tones will give a warm glow. Greens and blues will give off a cold light. I chose a purple fabric that has some gold in it to give it that all important warmth - and also goes with my lamp stand.
The backing that we're using can be bought online. Search for 'lampshade material' and look for semi-transparent, rigid, self-adhesive backing material, which you can buy in various thicknesses.
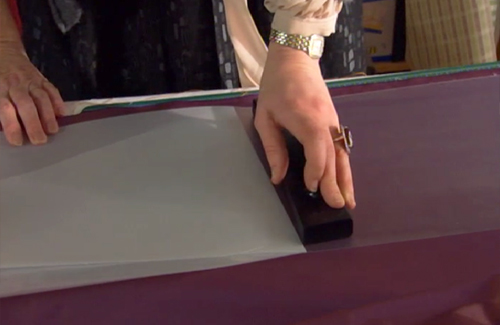
Make sure you iron the fabric, if it's creased. Then you can begin to smooth the backing material gently over the fabric.Start by pulling a few centimetres of the self-adhesive backing off your backing material and place it on the fabric. Slowly, continue to pull off the backing, pressing with your other hand and making sure you keep it smooth. If you're doing this for the first time, it's easier to get someone to help you with this step!
The backing that we're using can be bought online. Search for 'lampshade material' and look for semi-transparent, rigid, self-adhesive backing material, which you can buy in various thicknesses.
Make sure you iron the fabric, if it's creased. Then you can begin to smooth the backing material gently over the fabric.Start by pulling a few centimetres of the self-adhesive backing off your backing material and place it on the fabric. Slowly, continue to pull off the backing, pressing with your other hand and making sure you keep it smooth. If you're doing this for the first time, it's easier to get someone to help you with this step!

Step Two: Make The Wire Frame
Your lampshade wire frame has two rings - the top ring will be where the light fitting will go, and the bottom one is plain. Measure the circumference of the rings, then add 2cm for the overlap. This will be the width of your material.
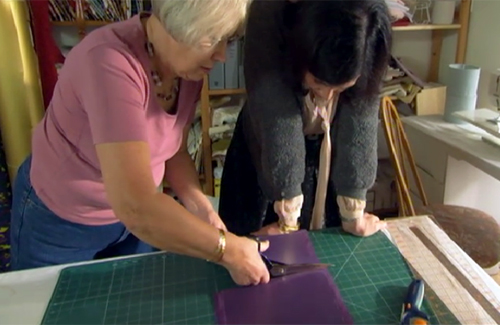
Step Three: Cut The Material
Cut the material to the width required (taken from the rings' circumference in the last step). The height you need to cut will be the height of the backing material, plus another few centimetres. This extra material will be wrapped around the frames in the next step, and tucked in at the end.

Step Four: Prepare The Material For Attachment To The Wire Frame
Now attach the rings to the material using special fabric double-sided sticky tape. Again, this is available online or in a lampshade making kit.
On the top and bottom edges of the material, in those extra few centimetres above and below the backing material, put a thin piece of tape along the width of the fabric, with a thicker piece on the outside edge. The thinner part will be for the wire to attach to, then the thicker part will be folded over and be tucked in.
On the top and bottom edges of the material, in those extra few centimetres above and below the backing material, put a thin piece of tape along the width of the fabric, with a thicker piece on the outside edge. The thinner part will be for the wire to attach to, then the thicker part will be folded over and be tucked in.

Step Five: Attach The Material To The Wire Frame
Again, if you're doing this for the first time, it's easier to get someone to help you with this step. Put the wire rings onto the thin lines of sticky tape on your material and carefully roll them along so that the material attaches to the frame. Use pegs to hold it, if you need to, as you go along. Where the fabric overlaps, use double-sided tape or a glue stick to secure it.
Now that the two rings are attached to the fabric, you'll see that the shade is really taking shape.
Now that the two rings are attached to the fabric, you'll see that the shade is really taking shape.

Step Six: Tuck In And Tidy Up
The last step is to finish the shade by bending the thicker line of sticky-taped material over the top of the wire frame, as neatly as possible. You might like to finish off the top and bottom with some braiding or bias binding.
No comments:
Post a Comment